Working with Text
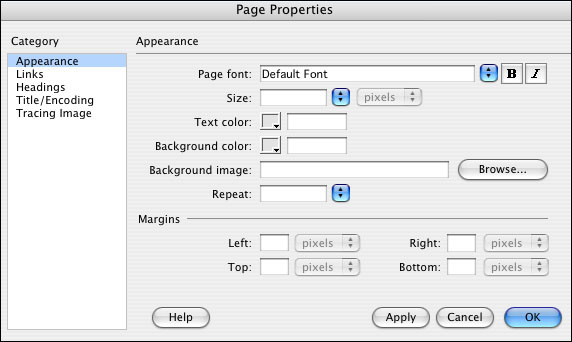
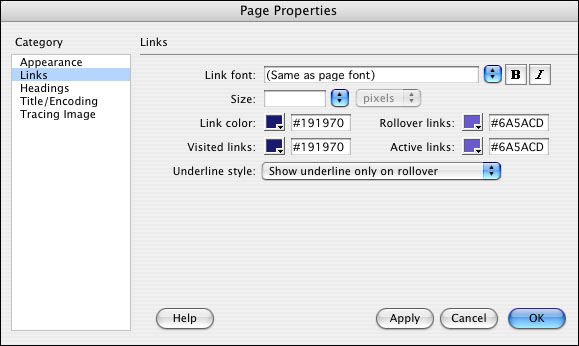
Page PropertiesIt is good practice to define homogenous sites, this means that all the pages of a site have to follow the same format, like having the same background color, the same font, etc. You can define each page format through page properties. You can open the window by pressing Ctrl+J (Windows), Cmd+J (Macintosh) or Click on the Modify menu and select the Page Properties option.
In Appearance category we find the properties:
In Links we find the next properties:
|
Text FormatThe Selected text format can be defined through the Text menu, and through the Properties inspector. We will see the alternatives offered by the Properties inspector.
|
Format
|
| Here we'll select a paragraph format previously designed for HTML, it can be header, paragraph or pre-formatted. The headings are used to establish titles inside a document. The preformatted format works to make the text appear such as it has been written. For example, if between two words you introduce many spaces they will be considered as only one but when you establish the preformatted format, the spaces will not be changed. |
Font
|
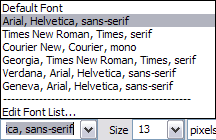
| Font lets you select a set of fonts. There are fonts sets instead of only one, because it's possible that if you set just one font, the user could not have that font in their computer. So, if you select a set of fonts, if the user doesn't have one of them, another is would be applied from the set. For example, if we choose Arial, Helvetia,Sans-serif, we'll see the text with Arial font, but if it doesn't exist in our computer, we'll see the text in Helvetia, and so on. |
Size

Lets you change the text size. We can indicate the size in different units, such as pixels, centimeters, etc..
Color 
Lets you select the font color, ignoring the defined color in the Page properties. If no color has been established here or in the Page properties, the text color will be black by default.
Style 
These buttons let you establish whether the text will be bold or italic. Through the Text menu you can underline the text and do many other things. This option isn't in the Properties panel. It's rarely used because links are underlined, and thus, underlining normal text could make users think it's a link.
Align 
Through these buttons it's possible to establish the text aligment in four different ways: left, center, right and justified.
List 
These buttons allow you to create bullet lists, or enumerated ones. When a List is selected, the List Item option on the property inspector becomes available. You can then have the option to modify the enumeration. For example, changing from numbers to roman numerals or letters.
- Item one
- sub item
- Item two
Text Indent 
These two buttons let you set, or clear the text indent. The text indent is a kind of margin which is established at both sides of a text. In this case, buttons are referred to the text left indent.
Creating Lists |
| You can insert text in a list mode. and this list can be enumerated or with bullets. To make a list from a previously introduced text in the document, you just have to select it and click on the right list option, through the Properties inspector, or through the Text menu. The bullet list (unordered) is selected
through the |
| Example of a enumerated list (ordered):
|
Example of a list with bullets (unordered):
|
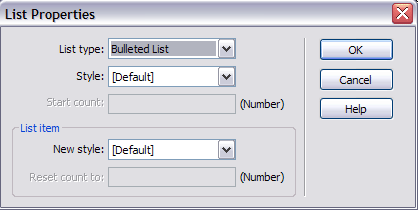
| To establish lists nested inside others, such as the previous examples, you need to add a text indent to the elements of the list you want to be part of the nested list. Through the Text menu, and then the List option, it's possible to access the properties of the selected list. You need to previously select the text list or have the cursor in any part of the list to activate this submenu. In the List properties window you can specify the list types (with numbers or bullets), the type of the numbers or bullets you will use (in the Style field), and in case of ordered lists, the number where the count starts.
|


